How To Open A Skool Community: Ultimate Simple Guide
“`html
Last Updated on May 2025
How to Open a Skool Community: The Complete Step-by-Step Guide
Learning how to open a Skool community is one of the smartest moves you can make if you want to build an engaged online audience. Whether you’re a coach, creator, or entrepreneur, Skool offers a simple yet powerful platform to host your community, courses, and calendars all in one place. In this guide, we’ll walk you through everything you need to know to launch your own thriving community on Skool.
You don’t need to be a tech wizard or have a massive budget. Skool is designed to be user-friendly and affordable, making it accessible for anyone ready to build something meaningful. Let’s dive in and explore how you can get started today.
Table of Contents
- What Is Skool and Why Use It?
- Benefits of Opening a Skool Community
- Step-by-Step: How to Open a Skool Community
- Common Mistakes to Avoid
- Future of Community Building on Skool
- Frequently Asked Questions
What Is Skool and Why Use It?
Skool is an all-in-one community platform that combines discussion forums, online courses, and event scheduling into a single, clean interface. It was built by Sam Ovens, a well-known entrepreneur, to solve the problem of fragmented community tools. Instead of juggling Facebook Groups, Teachable, and Zoom, you can manage everything in one place.
The platform has gained massive traction because it’s simple, affordable, and focused on what matters most: engagement. Unlike bloated platforms with endless features you’ll never use, Skool keeps things streamlined. You get a gamified community experience with leaderboards, levels, and points that keep members active and excited.
According to a Forbes report, community-led growth is one of the fastest-growing strategies for businesses in 2025. Skool positions you perfectly to capitalize on this trend by giving you all the tools you need to create a vibrant, engaged community around your brand or expertise.
Benefits of Opening a Skool Community
Before we get into the technical steps, let’s talk about why you should open a Skool community in the first place. Understanding the benefits will help you stay motivated and make the most of the platform once you launch.
All-in-One Platform
One of the biggest advantages of Skool is that it eliminates the need for multiple tools. You don’t need a separate course platform, a forum, and a scheduling app. Everything lives under one roof, which makes management easier and provides a better experience for your members.
Gamification Drives Engagement
Members earn points for posting, commenting, and participating in your community. This gamified approach creates natural competition and keeps people coming back. You’ll see higher retention rates compared to static Facebook Groups or Slack channels.
Recurring Revenue Potential
You can charge a monthly or annual subscription for access to your community and courses. This creates predictable recurring revenue, which is the holy grail for online business owners. Many creators are making five or even six figures per month by building the right community on Skool.
Clean, Distraction-Free Interface
Unlike Facebook, there are no ads, no political drama, and no algorithm showing cat videos when your members are trying to learn. Skool keeps the focus on your content and your community, which leads to deeper connections and better outcomes for everyone involved.
Step-by-Step: How to Open a Skool Community
Now let’s get into the practical steps. This is the exact process you need to follow to open a Skool community from scratch.
Step 1: Sign Up for Skool
Head over to Skool’s website and click the sign-up button. You’ll be asked to enter your email address and create a password. Skool offers a 14-day free trial, so you can test the platform without risking any money upfront.
After signing up, you’ll be taken to your dashboard. This is your command center where you’ll set up your community, create courses, and manage members.
Step 2: Choose a Community Name
Your community name should be clear, memorable, and relevant to your niche. Avoid overly clever names that confuse people. For example, if you teach fitness, something like “Fit Life Academy” works better than “The Gainz Zone.”
You can always change your community name later, but it’s better to start with something solid. Think about what your ideal members would search for and choose a name that reflects that.
Step 3: Customize Your Community Settings
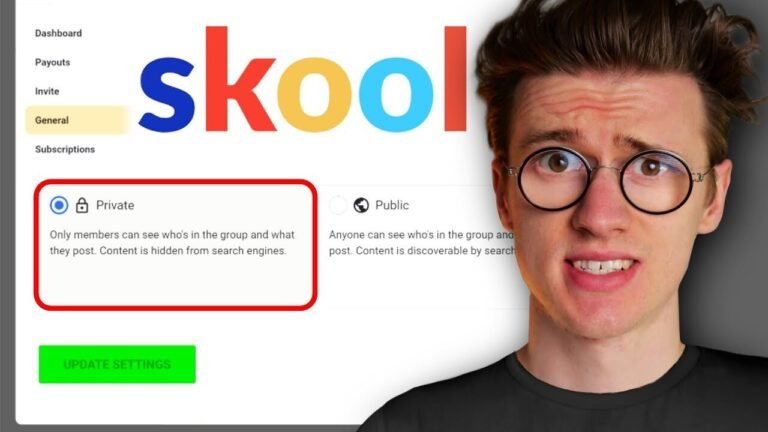
Click on the settings icon and start customizing your community. You’ll want to upload a logo or profile image, write a compelling description, and set your community to public or private. Public communities can be discovered by anyone on Skool, while private ones require an invite or payment.
You can also set your pricing here. Decide whether you want to offer a free community, a paid membership, or a freemium model where basic access is free but premium content costs money. Most successful creators charge between $29 and $99 per month for access to their communities.
Step 4: Create Your First Course or Content
Even if you’re not planning to run a full course, it’s smart to create some onboarding content or a getting-started guide. This helps new members understand what your community is about and how to get the most value from it.
Click on the “Classroom” tab and create your first module. You can upload videos, PDFs, or write text-based lessons. Keep your first piece of content short and actionable so members can experience a quick win.
Step 5: Set Up Discussion Categories
In the “Community” tab, you’ll see options to create discussion categories. These are like forums or channels where members can post questions, share wins, or discuss specific topics. Start with three to five categories to keep things organized without overwhelming people.
For example, you might have categories like “Introductions,” “Wins & Celebrations,” “Questions,” and “Resources.” You can always add more as your community grows.
Step 6: Add a Calendar Event
The calendar feature is perfect for hosting live calls, Q&A sessions, or workshops. Click on the “Calendar” tab and create your first event. Include a clear title, description, and Zoom link if you’re hosting it externally. Regular live events keep your community engaged and give members a reason to stay active.
Step 7: Invite Your First Members
Now it’s time to invite people. You can share your Skool community link on your email list, social media, or website. If you’re running a paid community, you’ll send people to your payment page where they can subscribe and get instant access.
Start small and focus on getting your first 10 to 20 engaged members. These early adopters will help you shape the culture and provide valuable feedback as you refine your community.
Step 8: Engage and Moderate Daily
Opening a Skool community is just the beginning. The real work is showing up every day to post, comment, and support your members. Communities thrive on consistent engagement from the leader.
Set aside 15 to 30 minutes each day to check in, answer questions, and celebrate member wins. This builds trust and encourages others to participate more actively.
Common Mistakes to Avoid When Opening a Skool Community
Even though Skool is easy to use, there are some common pitfalls that can slow your growth. Let’s look at what to avoid so you can launch with confidence and momentum.
Launching Without Any Content
Don’t invite people to an empty community. Have at least one course module, a welcome post, and a few discussion threads ready to go. First impressions matter, and an empty community feels like a ghost town.
Overcomplicating Your Setup
You don’t need 20 categories or 10 courses on day one. Start simple and expand as you learn what your members actually need. Complexity kills engagement, especially in the early days.
Ignoring the Gamification Features
One of Skool’s best features is the built-in gamification with levels and leaderboards. Don’t ignore this. Encourage members to earn points and celebrate top contributors. Gamification creates momentum and keeps people active.
Not Showing Up Consistently
If you disappear for days or weeks, your community will lose energy fast. Commit to showing up regularly, even if it’s just for a few minutes. Your presence sets the tone for everyone else.
Future of Community Building on Skool
Community-led growth isn’t going anywhere. In fact, it’s becoming the primary way businesses build trust and generate revenue in 2025 and beyond. Platforms like Skool are positioned to dominate this space because they focus on simplicity and engagement.
We’re also seeing more creators move away from free social media groups and into paid communities. Why? Because paid members are more committed, more engaged, and easier to serve. When people pay for access, they show up differently.
Expect Skool to continue adding features that make it even easier to monetize and scale your community. The platform is still relatively new, which means early adopters have a big advantage. Now is the perfect time to open your Skool community and establish yourself as a leader in your niche.
Frequently Asked Questions
- How much does it cost to open a Skool community? Skool costs $99 per month after your 14-day free trial. There are no extra fees, no hidden costs, and no limits on members or content. This makes it one of the most affordable all-in-one platforms available.
- Can I run a free community on Skool? Yes, you can absolutely run a free community on Skool. Many creators start with a free community to build an audience, then launch a paid tier later. You have full control over your pricing model.
- Do I need technical skills to open a Skool community? Not at all. Skool is designed to be intuitive and beginner-friendly. If you can use Facebook or send an email, you can manage a Skool community. The interface is clean and straightforward.
- How do I get my first members? Start by inviting your email list, promoting on social media, and offering a special launch deal. You can also collaborate with other creators or run ads to drive traffic. The key is to start small and focus on delivering value to your early members.
- Can I migrate my existing community to Skool? Yes, many creators successfully migrate from Facebook Groups, Discord, or Circle to Skool. You’ll need to invite your members manually and encourage them to make the switch. Offering exclusive content or bonuses can help with the transition.
Recommended Tools I Use
I personally use these tools in the video/workflow. Check them out:
- Skool Platform – The all-in-one community builder
SEO Checklist Confirmation
| ✅ | Focus keyword in title, meta, slug, intro, headings, and alt text |
| ✅ | 1% keyword density |
Similar Posts
|