Create Cinematic 3D Documentary Videos with AI in Minutes (Free)
In my video, I walk you through the fastest and easiest way to create cinematic 3D shots for documentaries or short films using nothing but AI tools and simple text prompts. This workflow eliminates the need for expensive software like Cinema 4D or Blender, and you don’t need any 3D animation experience whatsoever.
I’ll show you how to go from a basic idea to a fully animated, professional-looking video clip in just minutes.
This tutorial covers the complete process using free and accessible AI tools that anyone can start using today.
Why Your Prompt Quality Matters
The foundation of any great AI-generated visual starts with a well-crafted prompt. In my video, I explain that a good prompt is like a blueprint for a house—if your blueprint is messy, the house is going to be messy. Most people struggle with AI tools because they don’t invest enough time in creating detailed, descriptive prompts that guide the AI toward the exact vision they have in mind.
Instead of spending time trying to write complex prompts myself, I use a custom GPT from the GPT Store. I demonstrate how to search for the documentary style 3D image generator and click the start chat button. This specialized tool transforms simple ideas into highly detailed master prompts that are optimized for creating cinematic 3D images.
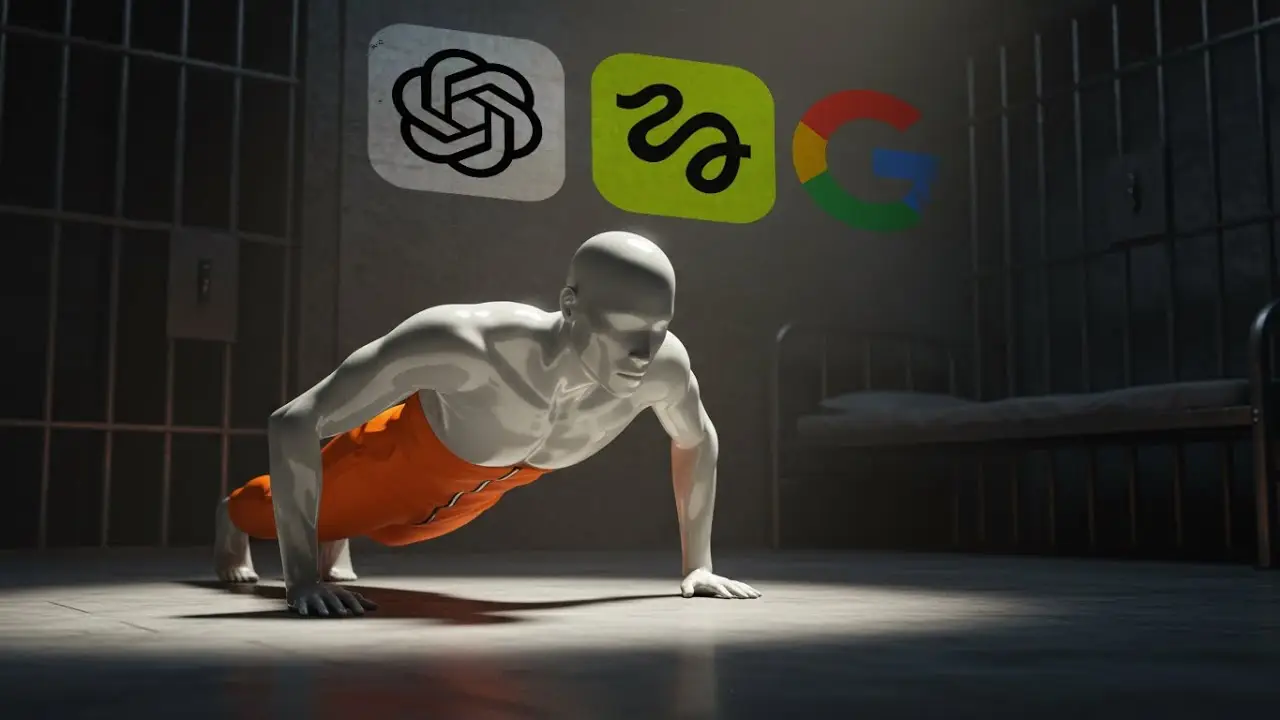
For example, in my demonstration, I simply input “a man in an orange jumpsuit in jail doing push-ups.” The GPT sometimes asks clarifying questions based on my input, then generates a comprehensive master prompt complete with lighting details, camera angles, mood descriptors, and even additional B-roll prompt suggestions. This is the secret sauce that separates amateur results from professional-looking content.
Generating High-Quality 3D Images with ImageFX
Once you have your master prompt ready, the next step is turning it into a visual. While there are many paid tools available for this purpose, I found that ImageFX by Google Labs is the best free option currently available. It’s powered by Google’s Imagen 3 model and designed to be incredibly user-friendly, even for complete beginners.
In my video, I show you exactly how to navigate to the ImageFX website, paste your master prompt from ChatGPT, and choose your preferred aspect ratio. What impressed me most about this tool is that it generates four different variations from a single prompt, giving you multiple professional options to choose from without any additional effort.
The quality of these results is genuinely impressive. You don’t need to be an expert in 3D rendering or image generation to achieve results that look like they came from a professional production studio. Once you find the image variation you like best, you simply download it and move on to the animation phase.
Bringing Static Images to Life with Higgsfield
This is where the real magic happens. I use a tool called Higgsfield to transform static images into dynamic cinematic videos with sophisticated camera movements. Higgsfield has earned a reputation as one of the best tools on the market for this specific purpose, and it’s designed to be accessible even if you have no video editing experience.
In my tutorial, I walk through the Higgsfield interface. On the left side, you’ll find your control panel, and on the right is where your generated video will appear. The first step is clicking the change button next to the camera movement selector, which opens up a library of professional camera effects including dolly in, dolly out, pan, tilt, and more complex movements.
For my first demonstration, I chose the classic dolly in movement. In the prompt box, I typed “man doing slow push-ups” to give the AI specific direction about what motion should happen in the scene. I selected the Higgsfield Light model because it uses fewer credits while still producing excellent results, then hit generate.
Maximizing Free Credits with Kling 2.1
While waiting for the first generation to complete, I show viewers an important tip in my video. By clicking the dropdown menu and selecting the Kling 2.1 model, you can access unlimited free video generation without spending any credits. This is a game-changer for creators who want to experiment and iterate without worrying about burning through paid credits.
I also demonstrate how to set the duration to 5 seconds and bump the resolution up to 1080p for high-quality professional results. The output from this workflow is genuinely impressive—smooth animation of a figure doing a push-up in a prison cell with camera movement that gives it a real cinematic feel.
Both the Higgsfield Light result and the Kling 2.1 output look professional enough to use in actual documentary productions. The camera motion is smooth, the 3D rendering maintains consistency, and the overall aesthetic matches what you’d expect from much more expensive production methods.
Creating Varied Cinematic Shots
To show the versatility of this workflow, I create a second example in my video using a different camera movement. This time, I select the dolly out movement to reverse the camera direction and create a different emotional impact. For this image, I use the prompt “man sitting in a war zone” to demonstrate how this technique works across different documentary themes and subjects.
Following the same workflow with the Higgsfield Light model, the results are equally impressive. The smooth camera motion adds a layer of production value that would typically require expensive equipment, experienced camera operators, and complex post-production work. Instead, this entire process takes just a few minutes and requires nothing more than text prompts and a few clicks.
Applications Beyond Single Shots
The real power of this workflow becomes apparent when you consider its scalability. In my video, I explain that this same process can be applied to create entire animated documentary channels or history story videos. The results maintain a consistent quality and style across multiple shots, which is crucial for longer-form content.
This approach represents a fraction of the cost and effort required by traditional 3D animation methods. Instead of learning complex software like Blender or Cinema 4D, spending weeks modeling and rigging characters, and rendering for hours or days, you can produce professional-looking animated documentary footage in minutes. The barrier to entry for creating high-quality visual content has never been lower.
The Complete Toolkit
Throughout my tutorial, I reference three essential tools that make this entire workflow possible. The custom GPT for generating master prompts handles the creative heavy lifting of prompt engineering. ImageFX by Google Labs provides the high-quality 3D rendered images that serve as the foundation for your animations. Finally, Higgsfield and Kling 2.1 bring those static images to life with professional camera movements and smooth animation.
All of these tools are linked in my video description, making it easy for anyone to start creating their own documentary video assets immediately. Whether you’re working on historical documentaries, true crime content, educational videos, or narrative short films, this workflow opens up creative possibilities that were previously only accessible to productions with significant budgets and technical expertise.
The democratization of these tools means that compelling visual storytelling is now within reach for independent creators, small production companies, and anyone with a story to tell. The quality you can achieve rivals what professional studios were producing just a few years ago, and the speed at which you can work allows for rapid iteration and experimentation that simply wasn’t possible with traditional animation pipelines.