$0 to $1K MRR in 30 Days: My 8-Step Skool Community Framework
In my latest video, I walk you through the exact eight-step framework I used to build a brand new community from zero audience and generate my first $1,000 in revenue. This isn’t theory—it’s a real-world case study with transparent numbers, ad costs, and conversion rates that you can replicate starting today.
I documented every decision, every test, and every dollar spent so you can see what actually works when launching a paid membership without leveraging an existing following.
Here’s the complete breakdown of how I went from concept to $658 in monthly recurring revenue in just 30 days.
Step 1: Gaining Clarity Through Intentional Vision Work
I spent an entire month before launching anything just gaining clarity on what type of community I truly wanted to create. This wasn’t wasted time—it was foundational strategic work that informed every decision afterward. I built out a detailed vision board and worked through my one-pager business plan framework to identify my north star vision and the ambitious, society-accepted goal I wanted to work toward.
During this month, I made real progress in the area I planned to teach. I changed my diet and nutrition habits, set ambitious sub-goals, and tracked my daily progress meticulously. This wasn’t just planning—I was living the transformation I intended to offer my future members. I journaled regularly and collected insights that would later become the backbone of my course content.
The key takeaway here is that clarity precedes execution. By spending this time upfront, I was able to define the precise before-and-after transformation my members would experience, which became the outline for everything that followed.
Step 2: Creating the Offer on Skool
Once I had clarity, I moved to offer creation. In my experience after five years of building online education offers, Skool is the easiest platform to structure a community-based product. I started with the 14-day trial and worked through the typical community setup steps, which naturally forced me to gain even more clarity as I went.
I structured my community around a foundational course that walked members through a specific transformation. The course content was intentionally concise—my videos ranged from 13 to 28 minutes each, totaling about two hours of content when watched at normal speed. I always consume content at 2X speed myself, so I designed it to be digestible and action-focused rather than overwhelming.
Beyond the foundational course, I added a tool vault with quick-win resources. In the beginning, many of these were just placeholders with lock icons—I filled them in over time as I created the resources. I also scheduled one community talk on the calendar for the future. That was it. I didn’t wait for perfection; I launched with the essentials and built as I grew.
I created a mockup screenshot of the community and recorded a walkthrough video sharing my vision and what members would get. This became my primary promotional asset. The beauty of Skool is that the platform structure forces you to have all the right elements in place before you launch.
Step 3: Testing Three Audience Growth Strategies with Meta Ads
Since I was starting with zero audience and wasn’t allowing myself to use my existing social media, email list, YouTube channel, or connections, I needed to test the fastest way to build an audience from scratch. I chose Meta ads because they provide the quickest market response and allow for rapid testing.
Theory 1: Lead Generation Campaign with Instant Forms
My first test used a lead generation campaign with Facebook’s instant forms. The idea was to grow my email list first by promoting what I had in the community as a course. When someone clicked the ad, they saw an opt-in form that lived directly on Facebook, which they could fill out with pre-populated information. This is the lowest friction way to capture leads.
After they opted in, they received an email from Skool (integrated via Zapier) inviting them to the free community. The confirmation message also directed them to my new Instagram account, creating a triple benefit: email list growth, community growth, and Instagram followers. My cost per lead with this method was €1.32, which was remarkably affordable.
Theory 2: High-Intent Sales Campaign with $7 WhatsApp Support
For my second test, I went to the opposite extreme—highest friction, highest intent. Instead of a lead generation campaign, I ran a sales campaign optimized for purchases. I sent traffic to a website landing page offering 7-day WhatsApp accountability support for $7 (framed as “$1 per day support”).
Two people purchased this offer, and it cost me roughly €40 per sale. On the surface, losing €33 per transaction seems terrible. But here’s the strategic thinking: someone booking 7 days of WhatsApp support is highly likely to become an ongoing one-to-one client. For someone building a coaching business and selling higher-ticket packages, this is actually a profitable customer acquisition strategy. The cost per lead was €5.20, significantly higher than the instant form method, but the lead quality was substantially better.
Theory 3: Direct to Skool Using Conversion API (The Winner)
My third test was running ads directly to the Skool community using the conversion API. I set up a sales campaign optimized for “complete registration” instead of using the typical lead generation objective. I used the exact same ad creative to isolate variables and truly compare performance.
This was the first time I’d ever seen a sales campaign optimizing for complete registration outperform a lead generation campaign with instant forms. It cost me about €62 to test this strategy, the same as the other two tests, but once I identified it as the winner, I doubled and tripled down on the ad spend. This became my primary acquisition channel.
Scaling Strategy: Country Expansion
Once I had my winning creative with good social proof, I ran a “country expansion campaign.” I started by targeting the top four English-speaking countries (United States, Australia, United Kingdom, and Canada), then created a separate campaign targeting tier-two countries with high purchasing power—places like Czech Republic, Finland, France, Germany, Italy, Netherlands, and New Zealand.
These tier-two countries often allow you to build your audience for cheaper while still maintaining good member quality. This gave me valuable data about which countries converted best, which informed my later purchase campaigns when I switched to a paid model.
Promoting Specific Course Content vs. The Community
I also tested promoting a specific course inside the community rather than promoting the community as a whole. After I delivered my first training, I productized it into a standalone course offer with its own mockup. I created new ad copy that led with the course value and then mentioned the community as an additional benefit.
This ad also performed well, though slightly more expensive per registration than the direct-to-community ads. However, the real value was in scalability—by having multiple pathways into my community, I could spend more total budget while keeping costs stable. I don’t think in terms of either/or; I think in terms of multiple pathways into my world.
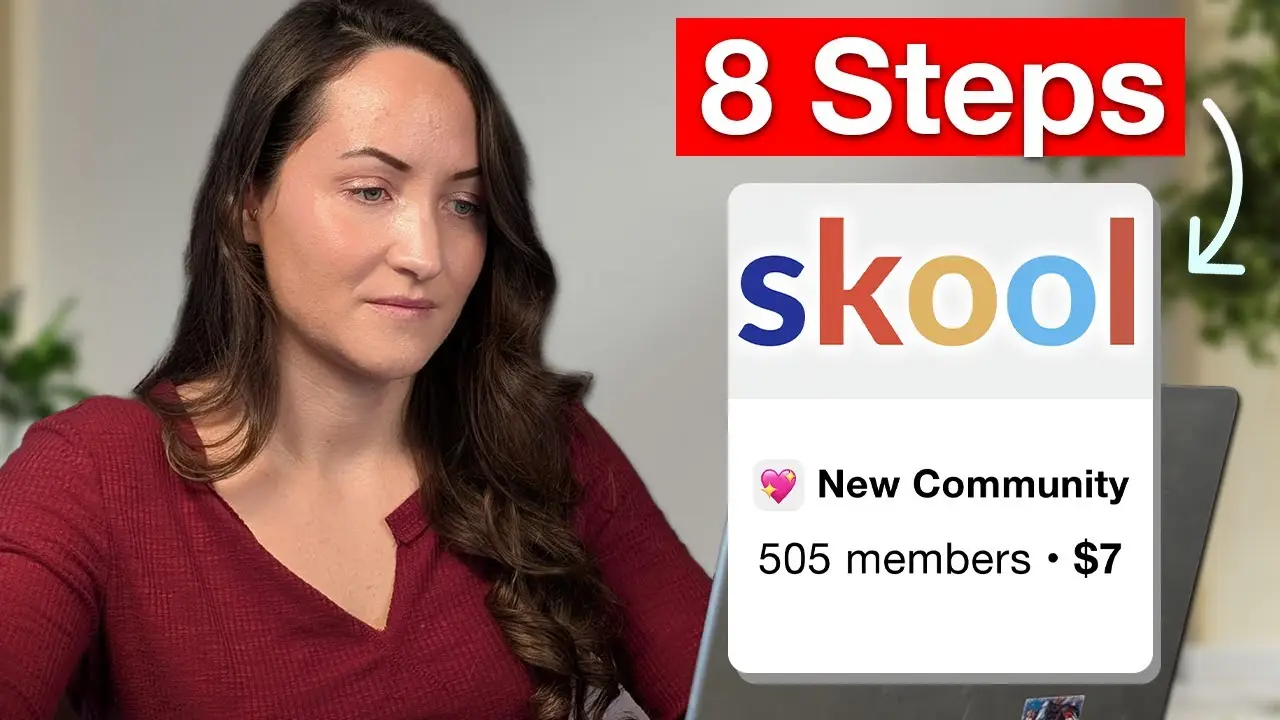
In total, I spent €583 ($671) on audience growth, which brought in 505 free members. That’s a cost of $1.33 per highly qualified, targeted group member. Every single one of those members was also added to my email list.
Step 5: Getting Community Engagement Off the Ground
The fifth step was driving engagement in the group. Rather than rehash that entire process in my video, I referenced a detailed tutorial I’d previously created that breaks down every single step I took to activate a new community. That dedicated video covers the specific tactics and strategies for getting members to participate, post, and engage with the content and each other.
Step 6: Making the First Sales
My very first sale came from the website tripwire—one of those $7 WhatsApp support offers. The first sale inside the Skool community happened on May 17th, exactly one month before I recorded this video breakdown. It was also a $7 WhatsApp support booking, which I celebrated in the community.
Setting Up Paid Offers Inside Skool
I offered three upgrade options inside my free community, all of which you can set up easily even in a free Skool account. To create a paid offer, you simply create a new course, select “buy now,” set your price, upload a banner image, and write a description. I offered:
- 7-Day WhatsApp Accountability Support ($7): “You already know what to do, you just haven’t had support to follow through. This is that support for 7 days. I’ll personally check in with you on WhatsApp, respond to your updates, and answer your questions via voice message.”
- 60-Minute Clarity Call ($33, later increased to $97): A focused session to explore self-image, uncover blocks, and craft a more aligned identity.
- 30-Day Support Package ($111): Includes a 60-minute kickoff call, 30-minute midpoint check-in, 60-minute debrief, plus ongoing WhatsApp access with custom tools and resources.
I’m fully aware these are low-cost, service-based offers. But when you’re starting out, you need to work one-to-one with people to truly understand what’s needed. This isn’t necessarily coaching—it’s accountability and support to help members use the course resources better.
Sales Progression and Results
My sales progression was interesting. The first several sales were all WhatsApp support bookings at $7. Then as engagement increased and members saw results, people started skipping the WhatsApp support and booking clarity calls instead—they wanted more proximity to me. I sold five clarity calls at $33 (totaling $165) and two at the increased price of $97 (totaling $194).
Two members who booked clarity calls subsequently purchased the 30-day support package at $111 each. In total, one-time sales in the community reached $676, which significantly offset my audience growth costs. This meant my testing and trial-and-error phase was essentially paid for by these initial service offers.
Step 7: Switching from Free to Paid Membership
I always knew I didn’t want to build a one-to-one coaching business in this area. I wanted to create content, share what’s working for me, and build solutions, processes, and AI prompts around personal development. I’m enthusiastic about optimizing myself using AI, and I want to share that journey—not position myself as an authority, but as the most enthusiastic student doing the work alongside members.
Once I reached 500 members, I decided to turn the community paid on July 4th. The process on Skool is incredibly simple: go to pricing, add a price, and set your monthly amount. I started with just a monthly option at $7 per month (I added an annual option later).
I updated my about page copy to reflect the paid status and adjusted my winning ad creatives to include the social proof I’d built over the previous month. I tested two approaches again: promoting the community directly versus promoting a specific course inside the community.
Initial Paid Membership Results
For the ad promoting the community directly, I updated the mockup to include social proof (“Join 500+ members”) and clearly displayed the $7/month price in the headline with a flame emoji to draw attention. This ad performed significantly better right from the start, getting two purchases for €18 in the first few days.
The course-focused ad took a bit longer to gain traction, ultimately getting two purchases for €19-21, which is actually decent for a direct membership ad. However, since one was clearly outperforming, I consolidated my budget behind the winner.
Within my first week of paid membership ads, I acquired 37 members at a cost of approximately $8.60 per member for a $7/month membership. This is remarkably close to break-even on the first month, which is exceptional for membership advertising.
Step 8: Scaling Strategy and Multi-Ad Approach
As I started to scale by increasing daily ad spend, I noticed the typical pattern: costs increase as you spend more. I was running image-based ads that were very bottom-of-funnel—they clearly showed what the offer was and prompted immediate purchase. To feed these conversion-focused ads and maintain lower costs at scale, I added an explainer video in short form.
The video told my solution discovery story (essentially my founder story) and had a significantly better click-through rate—13% compared to 4% on the static image ads. Link clicks were also much higher (5% versus less than 1%). However, the conversion rate was lower: about 6% compared to 17% on the static ads.
Here’s where the magic happens: these ads work together. The short-form video gets people into the funnel at a lower cost, building awareness and interest. Then the static image ads with clear mockups and pricing close the sale. By running both types of campaigns simultaneously, I was able to maintain lower costs while scaling total ad spend.
The Numbers After Two Weeks
Since switching to paid on July 4th (14 days before recording my video), I grew the community to 94 paid members generating $658 in monthly recurring revenue. I generated $1,364 in total income (including one-time offers and membership fees) and spent $1,602 on ads.
From a marketing perspective, I was $238 in the hole after two weeks—but with $658 in MRR already established. This means by month two, I would be profitable, assuming I maintained reasonable churn rates.
Full Expense Transparency
I want to be completely transparent about the actual costs, because revenue does not equal profit. Beyond ad spend, I had additional expenses:
- WordPress funnel template with upsell plugins: Used for the website tripwire test
- Zapier for integration: Monthly subscription
- Skool community cost: Monthly platform fee
Taking all investments into consideration, I was about $900 invested into the business in the first month. However, if you’re going with the minimal version—just Skool and ads without the website testing—you’d be about $333 down in the first month to build $658 in MRR, meaning you’d break even in month two.
Growth Projections and Scaling Plan
At the time of recording, I was spending $100 per day on ads with a cost per purchase around $10. My goal is to maintain this spend level for the next month to grow to approximately 400 members and reach $2,750 in MRR. This would leave me in a slight deficit for that month, but by month three, I’d be significantly profitable.
Currently my churn rate is 0%, though I expect it to increase as the community matures. For reference, my $97 community maintains only 2.88% churn, so I’m confident I can keep churn low with good engagement and value delivery. My ambitious vision is to reach 1,000 members by month four, though I acknowledge ads don’t always scale linearly.
Adding a Self-Liquidating Offer (SLO)
To accelerate growth, I’m currently working on another offer around willpower and using AI to acquire skills often mistaken for willpower. This will live on a separate landing page as a self-liquidating offer—a low-cost front-end product (likely $9) that covers ad costs while funneling buyers into the membership.
I’m already running similar SLO funnels for my other businesses with success, and this represents another pathway into the community. The goal is to profitably scale ad spend and reach that thousand-member milestone faster by having multiple conversion points and offers at different price points.
The entire journey from zero to $1,000+ in revenue happened in about 60 days, with careful testing, rapid iteration, and a willingness to invest in paid advertising from day one. The framework is repeatable: gain clarity, create a structured offer on Skool, test audience growth channels, drive engagement, add monetization, switch to paid, and scale with multiple ad types working in concert.